100 Days on Chunk Survive 100 Days Walkthrough
Early, mid, and late phases with totems, multipliers, and boss timing.
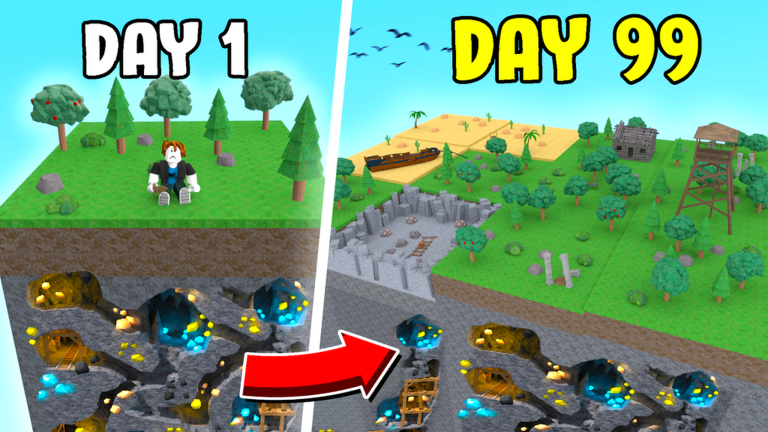
Goal of the run
Reaching Day 100 on a floating chunk means chaining three skills: expand safely in daylight, defend every night, and install day-multiplier totems only when your base can handle faster clocks and harder pressure. This walkthrough assumes you already know lobby basics from Getting Started. Class power helps—check the class tier list—but layout and materials decide whether multipliers bless you or delete you.
Early game (Days 1–20): stabilize
Objectives: cooked food surplus, sealed starter perimeter, first biome expansions, iron-tier tools, and a Bones stockpile started.
- Spawn, gather, cook, wall—in that order—before vanity builds.
- Craft one new biome chunk at a time and wall the seam the same day.
- Keep chests central; label mentally where food, ores, and rare drops live.
- Scout for bone piles while gathering; boss chunks will demand Bones soon — details in How to Get Bones.
- If you own Ninja or Lumberjack, lean into kite speed or wood snowball; Explorer players simply take cleaner fights and longer chop sessions.
Fail condition for early game: expanding faster than walls. If Night 10 still has open edges, pause biome crafts and finish the ring.
Early combat notes
Zombies test seams and stairs. Fight inside the pad, not on planks over void. Save bandages for post-wave heals. Medic makes this phase kinder; everyone else should over-prep food so hunger never coincides with a breach.
Mid game (Days 20–60): engines and first bosses
Objectives: quarry and specialty biomes online, reliable ore pipeline, first boss chunk clear, first day-multiplier totem, hunter raid readiness.
Economy engine
- Specialize pads: wood farm, cook line, ore drop zone, staging chest for boss materials.
- Quarry chunks improve ore and sometimes chest luck that feeds Bones and other rares.
- Keep upgrading weapons before you ego a boss recipe.
First boss window
When Bones and companion materials are ready, craft the early boss chunk route (Grounder / Graveyard style content—see Bosses and Raids). Clear with a kite plan, pick up drops, then craft or place the totem rewards that accelerate days.
Day multipliers are the mid-game spike. They shorten the slog to 100 but compress nights and raids. Install a multiplier only if:
- Walls survived the previous five nights without emergency rebuilds
- Food production exceeds consumption during fights
- You have repair mats pre-staged
If a multiplier makes nights unplayable, you installed it too early—focus on defenses before stacking more.
Hunter raids
Raids punish sprawling, unlit, half-walled bases. Hear the audio cue, pull fighters to a choke, and keep non-combatants on repair duty in co-op. Ninja’s dodge shines here; Vampire’s blood strike finishes packs once you can feed the bar safely.
Late game (Days 60–100): desert gates and finish
Objectives: Artifact farming in desert content, later boss clears (Pharaoh / Ancient Ruins style), additional totems, disciplined lightning control, and a boringly safe final stretch.
Artifact line
Later bosses ask for Artifacts sourced from desert chunks, legendary desert variants, and related chests. Do not soft-lock yourself crafting sand projects without reading How to Get Artifact. Treat desert expansion like early game again: one platform, same-day walls, food staged before deep scouting.
Lightning rods
Rods attract lightning. Placing a forest of rods in the center of storage is how highlight-reel bases become craters. Put rods on sacrificial outer pads away from chests, farms, and totems. If a storm pattern changes after a patch, reassess placement before the next multiplier.
Final stretch habits
- Stop experimental base surgery after Day 80 unless a wall is literally broken.
- Keep a “panic chest” of food, bandages, and backup weapons.
- Track totem count versus comfort—extra multipliers are optional if you are already winning nights.
- In public servers, communicate raid roles; random teammates demolishing walls help no one.
Crossing Day 100 is usually a logistics victory. The runs that look cinematic still rested on boring food math and sealed edges.
Totems and multiplier philosophy
Think of totems as gears in a transmission:
| Situation | Multiplier advice |
|---|---|
| Walls shaky, food tight | Delay; stabilize first |
| Mid-game bored but secure | Add first multiplier after first boss |
| Late game farming Artifacts | Moderate multipliers; leave reaction time for raids |
| Speeding a practiced route | Stack when clears are clean |
Bosses exist partly to gate these gears. Skipping material guides to rush a totem is how runs implode at Day 40.
Class recommendations by phase
- Early — Explorer learn, or Chef/Medic if soft; Lumberjack if you hate wood gates
- Mid — Ninja for raids; Engineer if crafting gates dominate
- Late — Vampire for boss DPS; keep Engineer value on constant crafts
Full numbers sit on All Classes. Gem farming without codes is covered on the Codes Hub.
Checklist before you queue a “serious” Day 100 attempt
- Class equipped in lobby
- Plan for Bones route bookmarked
- Desert Artifact plan understood
- Rod placement decided on an outer pad
- Food industrial enough for two wipe recoveries
- Know when you will install the first multiplier—and when you will refuse the second
Related pages
Play patient early, greedy mid only when walls allow, and boringly consistent late. Day 100 is a pace you choose with totems—not a cutscene that plays itself.
Frequently Asked Questions
Quick answers to the most common questions.
When should I place a day-multiplier totem?
After your walls and food economy survive several clean nights and you have cleared the boss content that gates the totem. If nights become unplayable, you stacked too early.
What materials gate mid and late bosses?
Bones gate early boss chunks; Artifacts matter for later desert bosses. See How to Get Bones and How to Get Artifact.
Do I need an S-tier class to reach Day 100?
No, but Ninja or Vampire make raids and bosses smoother. Learn the route on any class, then spend using the tier list.
Where should lightning rods go?
On outer sacrificial pads—not in the middle of storage or farms. Rods attract strikes; details in Bosses and Raids.